
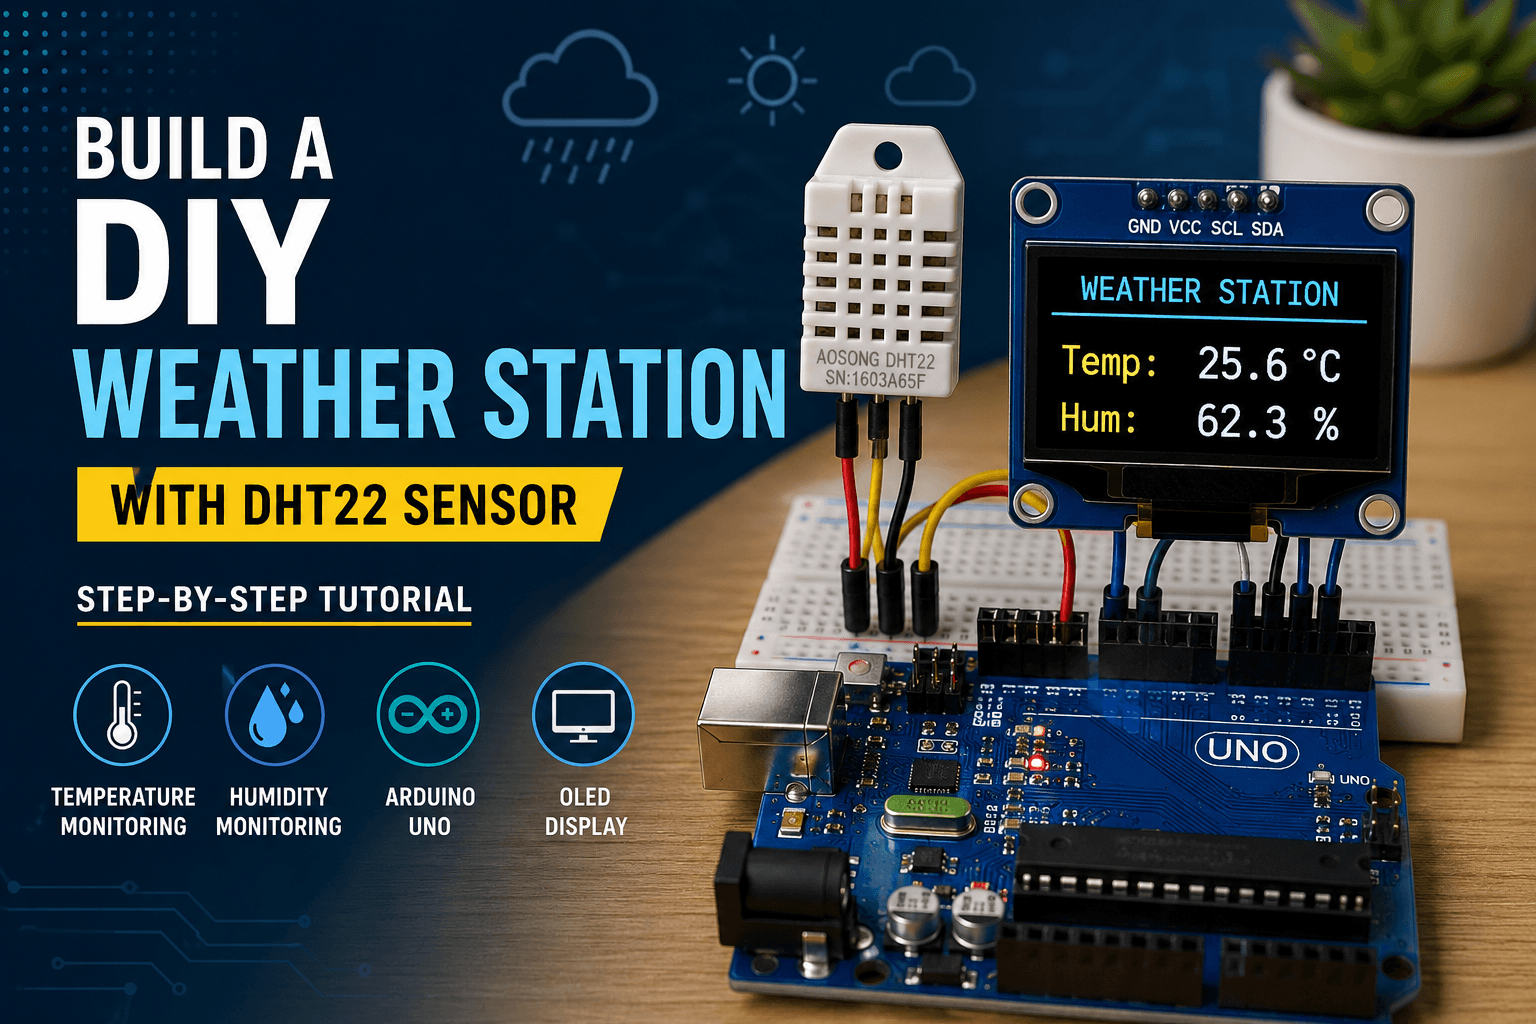
Build a DIY Weather Station with DHT22 Sensor (Step-by-Step)
Learn how to build a DIY weather station with DHT22 sensor, Arduino Uno, and OLED display. Follow this beginner-friendly step-by-step guide to measure temperature and humidity.
If you are looking for a fun and practical Arduino project, building a DIY weather station with DHT22 sensor is a great place to start.
In this project, we will use a DHT22 temperature and humidity sensor, Arduino Uno, and a 0.96-inch OLED display to build a simple weather monitoring system. The measured temperature and humidity will be displayed in real time on the OLED screen.
This project is suitable for students, beginners, electronics enthusiasts, Arduino learners, and DIY makers who want to learn how sensors, microcontrollers, and displays work together.
Project Level: Beginner
Estimated Time: 30–60 minutes
Microcontroller: Arduino Uno
Sensor: DHT22
Display: 0.96-inch I2C OLED
Programming: Arduino IDE
What Is a DIY Weather Station?
A weather station is an electronic system that measures and displays environmental conditions such as temperature, humidity, atmospheric pressure, and sometimes light or air quality.
In this beginner project, we will build a basic weather station that measures:
🌡️ Temperature
💧 Relative humidity
The DHT22 sensor sends temperature and humidity data to the Arduino Uno. The Arduino processes the data and displays the results on an OLED display.
The basic working process is:
DHT22 Sensor → Arduino Uno → OLED Display
This simple project also provides a foundation for more advanced IoT weather stations using ESP32, Wi-Fi, cloud dashboards, data logging, and mobile applications.
Components Required
You don't need many components to build this Arduino weather station.
ComponentQuantityPurposeArduino Uno1Main controllerDHT22 Sensor1Measures temperature and humidity0.96" OLED Display1Displays sensor readingsBreadboard1PrototypingJumper WiresAs requiredElectrical connections10kΩ Resistor1DHT22 data-line pull-upUSB Cable1Programming and powerComputer/Laptop1Arduino IDE programming
Recommended Components
For this project, you can use:
DHT22 Temperature & Humidity Sensor
Arduino Uno
0.96-inch SSD1306 I2C OLED Display
Breadboard
Male-to-male jumper wires
10kΩ resistor
If you are building this project for students or a classroom laboratory, preparing all components in a small project kit can make the assembly much easier.
How Does the DHT22 Sensor Work?
The DHT22, also known as AM2302, is a digital temperature and humidity sensor.
It contains a humidity sensing element, a temperature sensing element, and internal signal-processing electronics.
The sensor provides digital data to the Arduino through its data pin.
DHT22 typically provides:
Temperature measurement
Relative humidity measurement
Digital output
Better resolution and range than the basic DHT11
Simple connection with Arduino
The DHT22 is commonly used in:
Weather monitoring
Greenhouse monitoring
Home automation
Environmental monitoring
IoT projects
Temperature monitoring systems
DIY electronics projects
Why Use DHT22 Instead of DHT11?
Both DHT11 and DHT22 are popular sensors for beginner Arduino projects, but DHT22 generally provides better measurement capability.
FeatureDHT11DHT22Temperature rangeMore limitedWiderHumidity rangeMore limitedWiderResolutionLowerHigherAccuracyLowerBetterCostLowerHigherSuitable forBasic projectsMore advanced monitoring
If you are building a simple classroom project, DHT11 can be sufficient. However, if you want better resolution and a wider measurement range, DHT22 is a better choice.
Step 1: Assemble the Circuit
Start by placing the Arduino Uno and breadboard on your workspace.
Connect the DHT22 sensor to the breadboard.
Connect:
DHT22 VCC → Arduino 5V
DHT22 GND → Arduino GND
DHT22 DATA → Arduino Digital Pin 2
For a bare DHT22 sensor, place a 10kΩ resistor between VCC and DATA.
Next, connect the OLED:
OLED VCC → Arduino 5V
OLED GND → Arduino GND
OLED SDA → Arduino A4
OLED SCL → Arduino A5
Before powering the circuit, carefully check all connections.
Step 2: Install Arduino IDE
To program the Arduino Uno, you need the Arduino IDE.
Install the Arduino IDE on your computer and connect the Arduino Uno using a USB cable.
After connecting the board:
Open Arduino IDE.
Select Tools → Board → Arduino Uno.
Select the correct COM port.
Create a new sketch.
Enter the weather station program.
Step 3: Install Required Libraries
Our project requires three main libraries.
DHT Sensor Library
The DHT library allows Arduino to communicate with the DHT22 sensor.
Adafruit Unified Sensor
This library is required by the Adafruit DHT library.
Adafruit SSD1306
This library controls the SSD1306 OLED display.
You can install the libraries from:
Arduino IDE → Sketch → Include Library → Manage Libraries
Search for:
DHT sensor library
Adafruit Unified Sensor
Adafruit SSD1306
Adafruit GFX Library
Install the required libraries.
Step 4: Upload the Arduino Weather Station Code
Copy the following code into Arduino IDE.
#include <Wire.h>
#include <Adafruit_GFX.h>
#include <Adafruit_SSD1306.h>
#include <DHT.h>

#define SCREEN_WIDTH 128
#define SCREEN_HEIGHT 64

#define OLED_RESET -1
#define OLED_ADDRESS 0x3C

#define DHTPIN 2
#define DHTTYPE DHT22

DHT dht(DHTPIN, DHTTYPE);

Adafruit_SSD1306 display(
  SCREEN_WIDTH,
  SCREEN_HEIGHT,
  &Wire,
  OLED_RESET
);

void setup() {
  Serial.begin(9600);

  dht.begin();

  if (!display.begin(
        SSD1306_SWITCHCAPVCC,
        OLED_ADDRESS)) {

    Serial.println("OLED initialization failed!");
    while (1);
  }

  display.clearDisplay();

  display.setTextColor(SSD1306_WHITE);
  display.setTextSize(1);

  display.setCursor(20, 5);
  display.println("DIY WEATHER");

  display.setCursor(35, 18);
  display.println("STATION");

  display.display();

  delay(2000);
}

void loop() {

  float humidity = dht.readHumidity();
  float temperature = dht.readTemperature();

  if (isnan(humidity) || isnan(temperature)) {

    Serial.println("Failed to read DHT22!");

    display.clearDisplay();

    display.setTextSize(1);
    display.setCursor(10, 25);
    display.println("Sensor Error!");

    display.display();

    delay(2000);
    return;
  }

  Serial.print("Temperature: ");
  Serial.print(temperature);
  Serial.println(" C");

  Serial.print("Humidity: ");
  Serial.print(humidity);
  Serial.println(" %");

  display.clearDisplay();

  display.setTextSize(1);

  display.setCursor(0, 0);
  display.println("WEATHER STATION");

  display.setTextSize(2);

  display.setCursor(0, 18);
  display.print("Temp:");

  display.setCursor(65, 18);
  display.print(temperature, 1);
  display.print(" C");

  display.setCursor(0, 43);
  display.print("Hum:");

  display.setCursor(65, 43);
  display.print(humidity, 1);
  display.print("%");

  display.display();

  delay(2000);
}
Step 5: Upload the Code
After entering the program:
Connect Arduino Uno to your computer.
Select Arduino Uno from the Board menu.
Select the correct COM port.
Click Verify.
Wait for the code to compile.
Click Upload.
Once the upload is complete, the OLED should display the weather information.
Step 6: Test the Weather Station
After powering the Arduino, the OLED should display something similar to:
WEATHER STATION

Temp:  25.4 C

Hum:   62.3%
The values will depend on your actual environment.
Try touching the DHT22 carefully or placing your hand near the sensor. You may notice the temperature and humidity readings change.
Important: Avoid directly touching the sensing element for extended periods because your body heat can affect the temperature reading.
Understanding the Arduino Code
Let's break down the important sections of the program.
Including Libraries
#include <Wire.h>
#include <Adafruit_GFX.h>
#include <Adafruit_SSD1306.h>
#include <DHT.h>
These libraries provide the functions required for:
I2C communication
OLED graphics
SSD1306 display control
DHT22 sensor communication
Defining the DHT22
#define DHTPIN 2
#define DHTTYPE DHT22
This tells Arduino that:
The DHT22 data pin is connected to Digital Pin 2.
The sensor type is DHT22.
Reading Temperature and Humidity
The following commands read the sensor values:
float humidity = dht.readHumidity();
float temperature = dht.readTemperature();
The temperature is returned in Celsius, while humidity is returned as a percentage.
Why Do We Use isnan()?
Sometimes a sensor may fail to provide valid data.
Therefore, the program checks:
if (isnan(humidity) || isnan(temperature))
If either reading is invalid, the program displays a sensor error instead of showing incorrect values.
This is a useful programming practice for sensor-based projects.
Understanding the OLED Display
The OLED used in this project is generally based on the SSD1306 controller.
The 0.96-inch OLED commonly has a resolution of:
128 × 64 pixels
Because it uses the I2C interface, only two communication lines are needed:
SDA
SCL
For Arduino Uno:
SDA = A4
SCL = A5
This makes I2C OLED displays very convenient for Arduino projects.
Troubleshooting Common Problems
If your weather station doesn't work on the first attempt, don't worry. Check the following.
Problem 1: OLED Is Blank
Check:
OLED VCC
OLED GND
SDA connection
SCL connection
OLED I2C address
The common SSD1306 I2C address is:
0x3C
Some displays may use a different address.
Problem 2: DHT22 Sensor Error
Check:
DHT22 VCC
DHT22 GND
DATA connection
Digital pin number
Pull-up resistor if using a bare sensor
Correct DHT library
Correct sensor type
Make sure the code contains:
#define DHTTYPE DHT22
and not:
#define DHTTYPE DHT11
Problem 3: Temperature Shows nan
If the Serial Monitor shows:
Temperature: nan
Humidity: nan
the Arduino is not receiving valid data from the DHT22.
Check the wiring and sensor configuration.
Also remember that DHT sensors should not be read excessively fast. The example program waits two seconds between readings.
Open the Serial Monitor
You can also monitor the sensor readings through the Arduino Serial Monitor.
Open:
Tools → Serial Monitor
Set the baud rate to:
9600
You should see:
Temperature: 25.4 C
Humidity: 62.3 %
This is useful for debugging the project and verifying that the DHT22 is working correctly.
How the DIY Weather Station Works
The complete working process can be summarized in four steps:
1. Sense
The DHT22 measures the surrounding temperature and humidity.
2. Process
Arduino Uno receives the digital sensor data.
3. Display
The Arduino sends the processed information to the OLED display.
4. Repeat
The system updates the readings periodically.
        ENVIRONMENT
             ↓
       +-------------+
       |    DHT22    |
       | Temperature |
       |  Humidity   |
       +-------------+
             ↓
       Digital Signal
             ↓
       +-------------+
       | Arduino UNO |
       | Processing  |
       +-------------+
             ↓
          I2C Data
             ↓
       +-------------+
       | OLED Display|
       | Temp / Hum. |
       +-------------+
Ways to Improve Your Weather Station
Once you successfully build the basic project, you can add more features.
1. Add Atmospheric Pressure
Add a BMP280 or BME280 sensor to measure atmospheric pressure.
A BME280 can also provide temperature and humidity measurements.
2. Add Real-Time Clock
Use an RTC module such as DS3231 to display:
Date
Time
Temperature
Humidity
This can turn your project into a standalone environmental monitoring device.
3. Add Data Logging
Use an SD card module to save sensor readings.
For example:
Time       Temperature    Humidity
10:00      25.2°C         60%
10:05      25.4°C         61%
10:10      25.6°C         62%
You can later analyze the data using Excel or another data-analysis tool.
4. Add Wi-Fi
For a more advanced version, replace the Arduino Uno with an ESP32.
The ESP32 can send weather data to:
Web dashboards
Mobile applications
Cloud platforms
MQTT servers
IoT platforms
This turns your basic weather station into an IoT weather monitoring system.
5. Add an Automatic Fan
You can connect a relay and fan.
For example:
Temperature > 30°C
        ↓
Arduino detects high temperature
        ↓
Relay ON
        ↓
Fan ON
This can be useful for:
Greenhouses
Server rooms
Electronics cabinets
Indoor environmental control
Applications of a DHT22 Weather Station
This project has many practical applications.
Educational Projects
Students can use it to learn:
Sensors
Arduino programming
I2C communication
Digital electronics
Embedded systems
Greenhouse Monitoring
Temperature and humidity can be monitored continuously.
Home Automation
The sensor can provide environmental data for automatic control systems.
IoT Projects
The project can be upgraded using ESP32 or ESP8266 to transmit data wirelessly.
Science Projects
Students can collect temperature and humidity data and analyze environmental changes over time.
Why This Is a Great Arduino Project for Beginners
The DHT22 weather station project combines several important electronics concepts in one practical project.
You learn:
How sensors work
How to connect electronic components
Arduino programming
Reading sensor data
I2C communication
OLED display control
Troubleshooting
Basic environmental monitoring
Instead of learning these concepts separately, you can see how they work together in a real application.
Project Cost and Difficulty
The project is relatively affordable and does not require complicated electronics.
Difficulty
⭐ Beginner-friendly
Programming Level
⭐ Beginner
Hardware Level
⭐ Beginner
Estimated Build Time
30–60 minutes
Skills Required
Basic knowledge of:
Arduino
Breadboard
Electrical connections
Arduino IDE
Upgrade Challenge: Build an IoT Weather Station
Once you complete the Arduino version, challenge yourself to build a Wi-Fi-enabled weather station.
A possible architecture is:
DHT22
  ↓
ESP32
  ↓
Wi-Fi
  ↓
Cloud / Web Server
  ↓
Mobile / Web Dashboard
Your advanced weather station could display:
Temperature
Humidity
Pressure
Date and time
Historical graphs
Weather alerts
Online sensor data
This is an excellent next step for students learning IoT and embedded systems.
Frequently Asked Questions
What is a DHT22 weather station?
A DHT22 weather station is a temperature and humidity monitoring system that uses a DHT22 sensor to measure environmental conditions and displays the readings using a microcontroller and display.
Can I use Arduino Uno with DHT22?
Yes. The DHT22 can be easily connected to an Arduino Uno using a digital input pin.
What is the difference between DHT11 and DHT22?
DHT22 generally provides a wider measurement range and higher resolution than DHT11, making it a better choice for applications requiring more detailed temperature and humidity measurements.
Can DHT22 measure pressure?
No. DHT22 measures temperature and relative humidity. You need a sensor such as BMP280 or BME280 to measure atmospheric pressure.
Can I use an OLED display with Arduino Uno?
Yes. An I2C OLED display such as a common 0.96-inch SSD1306 module can be connected to an Arduino Uno using the SDA and SCL pins.
Why is my DHT22 showing NaN?
NaN generally means the Arduino did not receive a valid sensor reading. Check the wiring, power supply, data pin, sensor type, pull-up resistor if applicable, and library installation.
Can I make this weather station wireless?
Yes. You can use an ESP32 or ESP8266 instead of Arduino Uno to add Wi-Fi connectivity and send the sensor data to a web or cloud platform.
Is DHT22 good for Arduino projects?
Yes. DHT22 is a popular choice for Arduino temperature and humidity monitoring projects because it is relatively simple to interface and provides digital readings.
Conclusion
Building a DIY weather station with DHT22 sensor is an excellent beginner Arduino project that combines hardware, programming, sensors, and display technology.
With just an Arduino Uno, DHT22 sensor, and OLED display, you can create a practical environmental monitoring system capable of displaying real-time temperature and humidity.
Once you understand the basic project, you can expand it by adding BME280 sensors, RTC modules, SD card data logging, relays, fans, Wi-Fi, cloud connectivity, and web dashboards.
If you're a student or electronics enthusiast, this project is a great starting point for learning Arduino, embedded systems, and IoT development.